There is an Ana Stadium build code on stadiumbuilds.io, JYS8P, that has pulled more than 28,000 views and a hundred-plus likes, and the premise is the kind of thing that sounds broken until you actually play it. It turns Ana, the backline sniper support most people keep glued to the payload, into a dive character who launches herself onto the enemy team, puts half the lobby to sleep, heals her own squad in the same breath, and somehow walks out alive. The author calls it Pekka’s Rank 1 Ana build. Everyone else calls it the Dreamy build, after the single power the entire loadout is built around.
I have spent enough time in Stadium mode to be skeptical of “rank one” tags on build sites. Most of them are marketing. This Ana Stadium build is not. The stats it reaches by round seven, a hair over 537 total life on a support with two dashes and area-effect crowd control, are the kind of numbers a tank would be happy with. It works because of one interaction that makes Ana’s Sleep Dart hit and heal an entire radius at once, and the rest of the build is just a long argument for why she should be allowed to survive long enough to do it.
If you have been following the Ana changes each Stadium season, you already know her kit has been gently pushed toward this kind of play. This loadout takes that nudge and runs with it. Here is what it does, how to buy it round by round, and where it falls apart.
A support that jumps on the enemy team
The thing that confuses people the first time they see this build is that Ana is not supposed to be in the enemy’s face. She is a 250-health sniper with no mobility and a punishing reload. The whole appeal of the character is that she does enormous work from range. So a build that asks you to dash onto the opposing tank sounds like a troll pick, and for the first round it almost is.
Then round two happens. Once the two core powers come online, Ana’s Sleep Dart stops being a single-target skillshot and becomes an area weapon that puts everyone in a circle to sleep and heals every ally standing in the same circle for roughly eighty percent of their health. Combined with a dash on every ability cast, she stops being a passenger in the backline and starts being the playmaker. You jump in, you sleep the fight, you heal the fight, and you jump out.
It is genuinely one of the strangest things Stadium mode has produced, and it is also one of the most effective I have played. The trade-off is that it asks a lot of you in the early rounds and it makes a single decision in round six Get those right and you spend the back half of the game feeling like you are cheating. It is the rare Ana Stadium build that rewards aggression over patience.
What the Dreamy power actually does
Everything in this build orbits one power: Dreamy. Without it you are playing regular Ana with extra steps. With it, Sleep Dart gains an area of effect. Every enemy caught in the radius falls asleep. Every ally caught in the radius gets healed. In later rounds that heal is around 400 health per target, and because Stadium lets abilities scale, it only gets bigger.
The reason this matters more than it sounds is cash. Stadium rewards you for healing and for impactful plays. A Sleep Dart that lands on three people and heals two of your own is the highest-value single cast Ana has access to, and it snowballs your economy. The build’s whole early game is built on farming that interaction so you can afford the survivability that makes the dive possible later.
The second power, Comfy Cloud, is what turns Dreamy from a strong tool into a playstyle. Comfy Cloud grants a dash whenever you use an ability. The author describes the synergy as “explosive,” and that is not hyperbole. Once both powers are live, you use Sleep Dart, you get a dash, you dash into the enemy cluster, the dart lands as an area effect, and you have just initiated a team fight from the most aggressive position a support can take. If you want a calmer take on Ana’s options, the three shades of Ana for Stadium breakdown is a good pairing read, but the Dreamy route is the one that plays least like the rest of her kit.
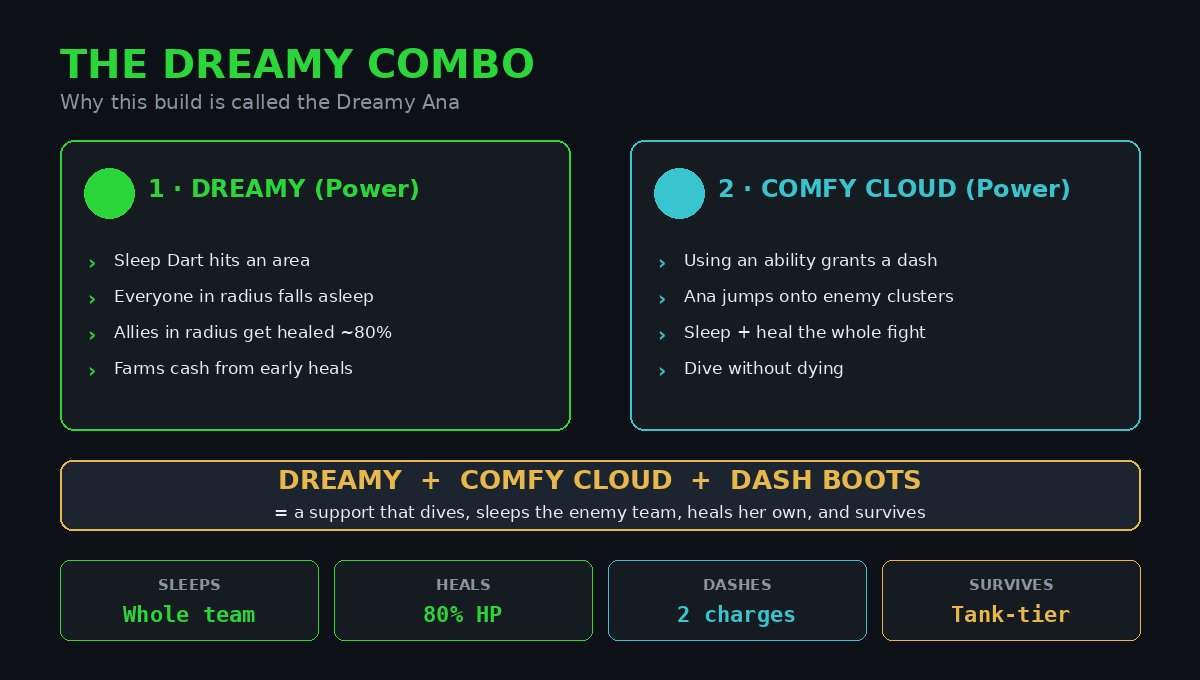
There is a third pillar that never gets a power slot but matters just as much: the dash boots. You pick up a second dash in round two and you never let it go. Two dash charges are what let you go in and get out. The build is not subtle about this. If you skip the mobility items, you will die on top of the enemy team, and you will deserve it.
The end-game numbers
By the end of round seven, the Dreamy Ana Stadium build sits at numbers that do not look like a support’s stat sheet. The final round carries 537 total life, 65 percent ability power, a chunk of shields gated behind Nano Boost, and enough move speed plus two dashes to cross a team fight in two casts.
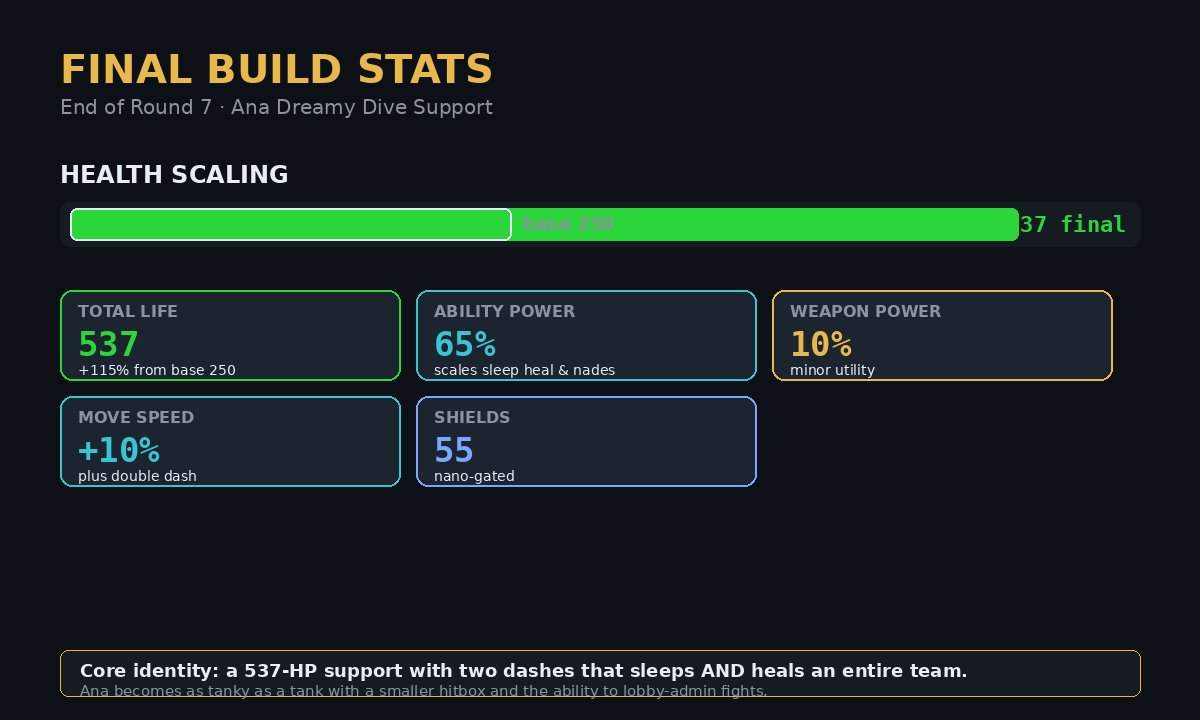
That is more than double Ana’s base 250 health, and it is the quiet point of the whole build. The flashy part is the diving and the area sleep. The reason the diving works is that by the time you are doing it, you are as tanky as the frontline you are jumping over. The 65 percent ability power is not there for damage. It is there to scale the sleep heal and the anti-nade, which means your entire utility kit hits harder the longer the game goes.
One detail worth noting: those shields and the spike from Vanadium Injection are tied to Nano Boost being ready. When your ult is charged you are a monster. When it is not, you are merely very durable. The build’s rhythm is built around knowing which of those two states you are in before you commit to a dive.
Round by round: how the build comes together
Stadium mode gives you seven rounds of cash and item picks, and the Dreamy route spends the first five of them becoming unkillable and the last two choosing how it wants to win. The full progression is dense, so here is the overview before the detail.
Rounds 1 and 2: farm cash, then spike
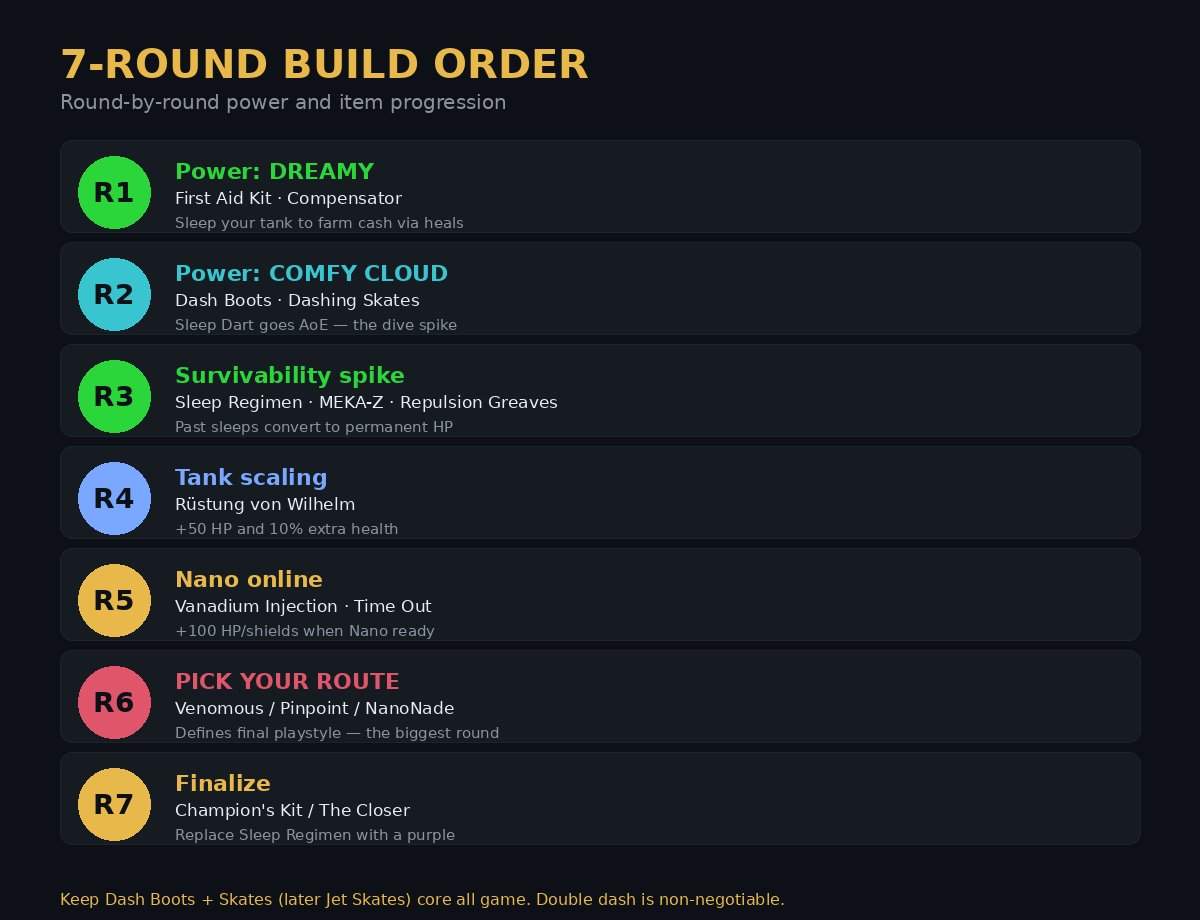
Round one is boring on purpose. You take Dreamy as your power and you spend the round landing Sleep Darts on your own tank. Every dart that lands on an ally heals them and pays you. The items here barely matter, First Aid Kit is the one consensus pick, and the rest are flex greens for a little extra health. The point is not to win the round. The point is to walk into round two with a fat wallet.
If the enemy has an easy-to-hit tank like Hazard, you can also shoot their tank to start stacking the Sleep Regimen item you will buy later. Either way, do not overthink round one. The author is blunt about it: the items are flexible, pick what suits the map and comp, and move on.
Round two is where the build becomes itself. You take Comfy Cloud and you buy Dash Boots and Dashing Skates. Sleep Dart is now an area ability, you have two dash charges, and the playstyle flips from passive to aggressive in a single buy window. From this round forward you are jumping on the enemy team to apply pressure, secure kills, and stall objectives. The build notes hammer one caveat, and it is worth repeating: this works best when you coordinate with a teammate. A diving Ana is a commitment, and going in alone is how you feed.
Rounds 3 to 5: turning a sniper into a tank
Round three is where the survivability curve bends hard. Sleep Regimen is the key spike because it converts every sleep you have landed so far, including the ones from rounds one and two, into permanent health. Because Dreamy makes Sleep Dart hit an area, that item stacks absurdly fast. MEKA-Z Series and Repulsion Greaves round out the buy with more health and move speed, and by the end of the round Ana is noticeably harder to kill than anyone expects a support to be.
Rounds four and five are straightforward stat padding with a purpose. Rüstung von Wilhelm gives a flat 50 health plus ten percent bonus health, which is a bigger deal than it reads when you already have a large pool. Round five adds Vanadium Injection, which grants 100 extra health and shields when Nano Boost is online, plus Time Out for the last slot. Time Out is sneakily strong here because its knockback can send slept enemies off the map, and it gives you an escape tool when something like Hazard decides you are the priority.
By the end of round five you are, in the author’s words, as tanky as a tank with a smaller hitbox and two dashes. This is the part of the build that feels unfair. The enemy team has spent five rounds assuming Ana is a squishy backline target, and that assumption is now wrong. There is a real downside baked in, though. Stadium rewards the enemy team for damaging high-cash targets, so the more successful your farm, the bigger the bounty on your head. You are strong, but you are also now the most valuable target on the server.
Round 6: the one decision that defines your game
Round six is the biggest round in any Stadium game, and the Dreamy Ana Stadium build treats it that way. This is where you pick your fourth power, and that pick decides what your final loadout looks like. There are three main routes, and the author is clear that the right one depends entirely on what the enemy team is running.
Venomous: the default aggressive route
Venomous is the go-to. It gives you two anti-nades that do heavy damage and heavy healing, and it lets Ana play much more aggressively because she can secure kills from across the fight. For this route you lean into ability power, aiming for around 40 percent when your ult is up. The trade is survivability. Venomous is burstier and scarier but a touch more fragile than the alternatives, and it makes up for that with raw pressure. If the enemy cannot cleanse the anti-nade, this is almost always the right call.
NanoNade: when the enemy has cleanses
If the enemy is running Kiriko, or anyone with a cleanse like Kitsune Charm, Venomous loses value because half your nade gets cleaned off. The answer is NanoNade. It boosts your anti-nade healing by 85 percent, adds a 12.5 percent damage boost and 12.5 percent damage reduction, and lets you keep scaling survivability instead of going all-in on ability power. It is the safer, more flexible route, and against cleanse comps it is the correct one.
Pinpoint Prescription: the execution route
The third option is for games where your team is not dying much and the enemy has too many cleanses to make the nades reliable. Pinpoint Prescription shifts the build toward weapon power and an execution playstyle, finishing off slept targets. The nice wrinkle is that weapon power scaling also boosts how much your weapon heals teammates, so it is not purely selfish. You pair it with Hardlight Accelerator, which is easy to max out because you have two dashes and a sleep to trigger it. This is the situational pick, but when the conditions line up it is a different and satisfying way to close games.
Round 7: the swap that matters
The final round is mostly cleanup. You drop Sleep Regimen, which has done its job by now, and replace it with a purple tier item that matches whatever route you committed to in round six. Venomous and Home Remedy routes want Champion’s Kit. Pinpoint Prescription wants The Closer. The survival-leaning routes, Falconer, Our Turn, NanoNade, lean on Crusader Hydraulics or Reinforced Titanium depending on whether the enemy comp is ability-power or weapon-power heavy.
This is also where Jet Skates replace your earlier Dashing Skates. They give a shorter dash cooldown plus ten percent ability and weapon power, and Grenadius Pin or Iridescent Iris fill the last slot for more ability power. The choice between those two comes down to whether you want a larger nade radius or cooldown reduction, and the author treats it as pure preference.
When the enemy runs cleanses
The single most important read in this build is whether the enemy can cleanse your anti-nade. It changes your round six power pick and it changes how aggressively you can play the back half of the game. If they have Kiriko, or any cleanse item like Kitsune Charm, you are on the NanoNade or Pinpoint route and you play a touch more patiently. If they do not, Venomous turns you into a genuine menace that can jump across the map for kills.
There is a smaller, sillier flex pick worth knowing about. Stratosphere Beacon in round one is a strong buy when the enemy is running fliers like Mercy, Pharah, Hazard, or Winston. It is not core, but it is the kind of situational pick that wins the round for you in the right matchup. The build is flexible by design in the early rounds, and the author encourages you to read the lobby rather than buy on autopilot.
The one item to never buy
There is a footnote in the build notes that is easy to miss and worth pulling out. Never take Codebreaker on this Ana Stadium build. Ana’s shots count as armour-piercing, so Codebreaker does almost nothing for her. The author concedes it technically works with the anti-nade, but the damage increase is around 2.5, which is meaningless. It is a trap pick that looks like it fits a damage support and does not. Skip it.
The community weight behind this build is not nothing. The notes mention endorsements from several top-ranked EU players across Reinhardt, Tracer, Wuyang, and Hazard. That is not proof of anything in a game as matchup-dependent as Overwatch, but it is a decent signal that the loadout holds up outside the one lobby it was built in. You can also see how it compares to a completely different approach in the Ana Speed Damage build, which takes her in the opposite direction.
Who is this Ana Stadium build for?
The honest answer is that this is not a beginner build. It asks you to land area Sleep Darts on clustered targets, to manage two dash charges, to read whether the enemy has cleanses before round six, and to commit to dives that will get you killed if you mistime them. If you are new to Stadium or to Ana, the calmer backline playstyle will serve you better, and a more general Overwatch 2 tips guide is a friendlier starting point.
But if you already understand Ana’s kit and you want the version of her that plays like no other support in the game, this is it. The Dreamy route is loud, aggressive, and surprisingly durable, and the round-six decision tree means it adapts to the enemy comp rather than folding the moment someone picks a counter. It is also just fun in a way that regular Ana is not. There is something deeply satisfying about diving onto a tank, putting the whole team to sleep, and walking away at 500-plus health.
Grab build code JYS8P, take Dreamy in round one, and accept that for the first ninety seconds you are going to look silly shooting Sleep Darts at your own tank. The payoff is worth it. This Ana Stadium build earns its rank-one tag the hard way. Just remember the one rule the whole build is built on: two dashes or bust. Go in with one and you are staying in.